
Let’s start with the basics. Classical and flamenco guitars are strung with nylon strings that tie onto the bridge. This ancient system originally was designed for “gut” strings, and there are a number of ways to tie them, some more effective than others.
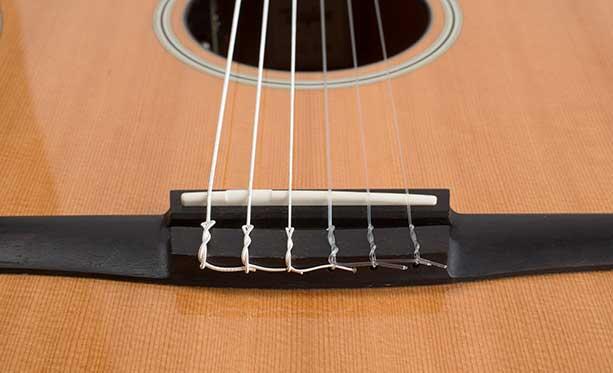
Here at Taylor, we have developed an effective protocol for this simple but often misunderstood procedure. For best results, it’s important to understand how the strings hold onto the bridge. The strings should twist around themselves twice (three times for treble strings), and the final loop must pass below the corner of the back of the bridge so that the strings remain secure and in tune. Now, let’s outline the process in simple steps. At Taylor, we string these guitars with D'Addario (EJ46FF) Pro-Arté Carbon, Dynacore Basses, Hard Tension strings.
Before putting on your new strings, we suggest that you place a Post-it® note on top of the guitar, behind the bridge, to prevent possible damage to the top while changing the strings. Nylon strings often have one end loosely wound for greater flexibility. This is the end that ties onto the bridge.Slide the end of the string through the hole in the front side of the bridge. Leave about three inches of string sticking out behind the bridge.

Bring the end of the string back around on the inside and wrap it under the string (toward the treble side of the bridge). This creates a loop with the string.
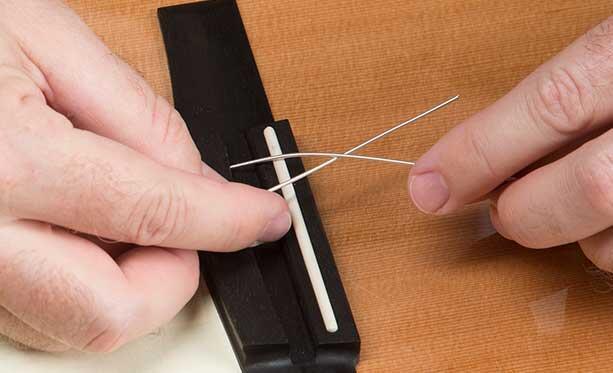
Wrap the end of the string under the first loop to twist the string around itself.

Wrap the end of the string around again, repeating the same motion from the previous step. This will create the second of the two twists needed.
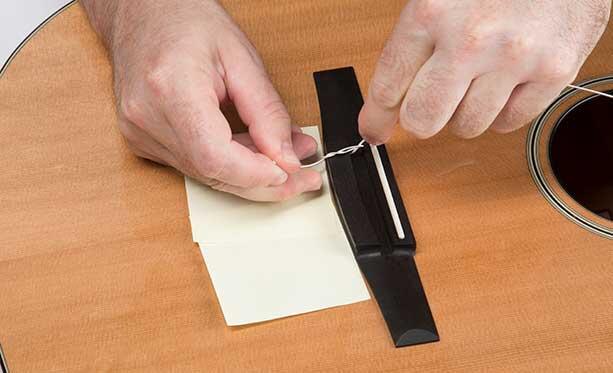
Pull the string tight. The end of the string should now rest along the back side of the bridge.
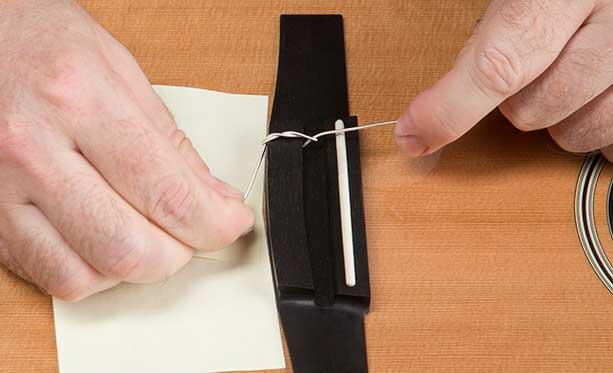
Leave enough string loose at the bridge to go just past the next hole after you pull it tight. The next string will wrap over the end of the first to keep it secure and neat.
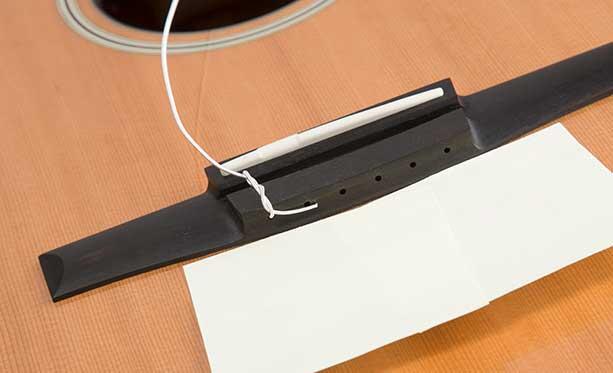
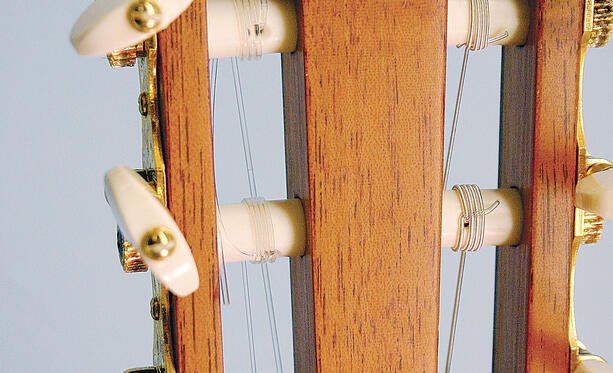
Pass the other end of the string through the hole in the tuning machine, with the end now pointing through the hole toward the body of the guitar.

Pass the peghead end of the string up and behind the tuning machine so it can be looped under the string as shown in the next step.
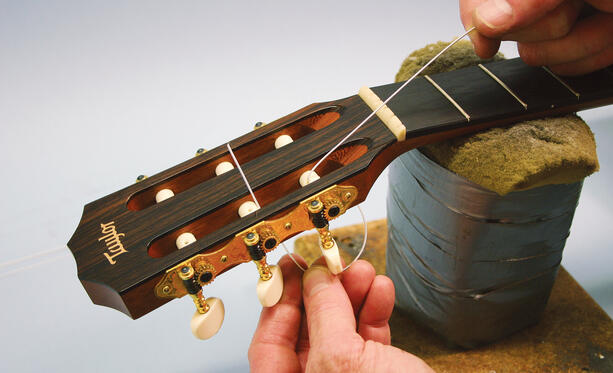
Hold a little tension on the string with your upright right fist (to create the correct amount of slack) as you pull the loop tight against the roller with your left hand. The bend should be in the top of the tuner hole to lock the string in position.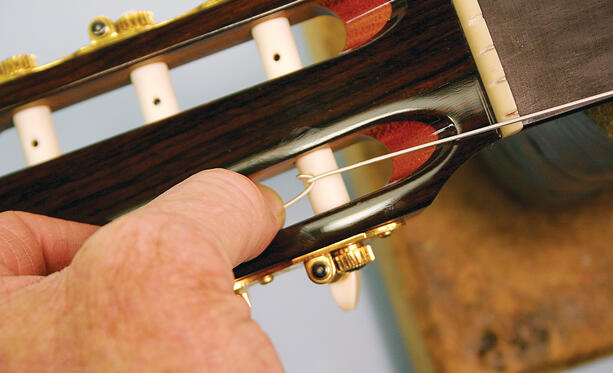
Tighten the string, winding it toward the outside of the rollers, over the tail of the string. Guide the string so that it is neatly coiled and doesn’t rub on the edges of the peghead. Tune to pitch. For best tuning, use a maximum of 4-6 wraps, and then snip the excess string end.
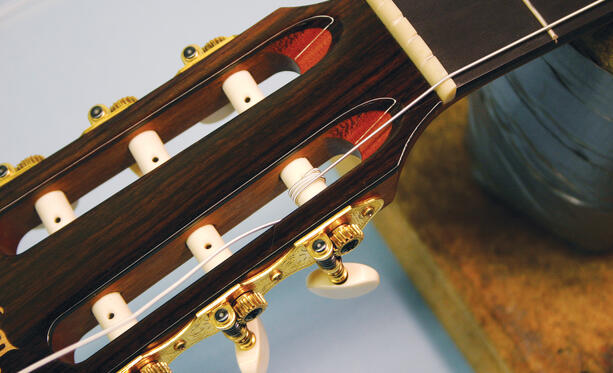
Pull the A (5th) string into position. When you add the next string, tuck the end of the first one under the new string to keep it tied against the back of the bridge. Repeat this step for each string you change so that each string is tied neatly to the bridge.
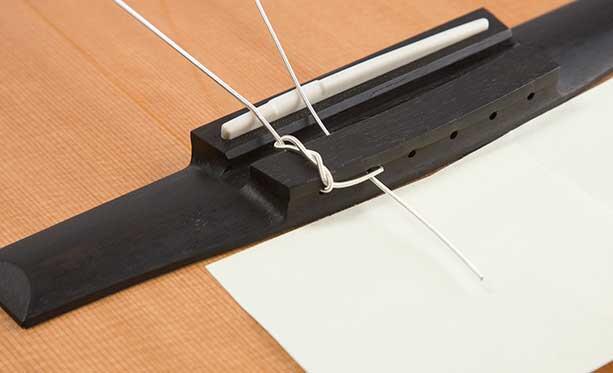
Snip the excess from the 6th (E) string, making sure the remainder of the string is a little shorter than the distance to the next hole. Next, put on the 4th (D) string, using the same method as with the 6th and 5th strings.
After changing strings, use your thumbs and forefingers to gently stretch each string across its entire length. Tune the strings to pitch and repeat the stretching procedure two or three times.
Comments
Article is closed for comments.